Art DIY Mackenzie

DIY Flower Headband for Baby Girls

April 23, 2011

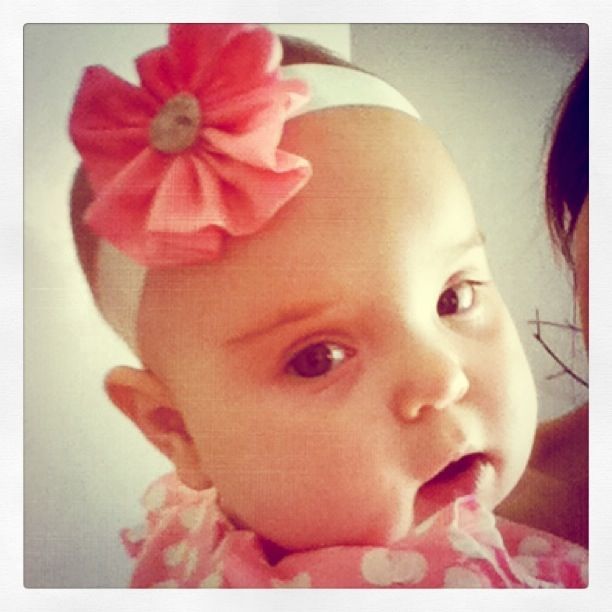
I made this adorable headband this afternoon to complement Mackenzie’s Easter dress. It was so easy to do, and there are a million possible variations.

Supplies Needed:
Ribbon for band
3.5″x18″ strip of fabric for flower
2″ of .25″ wide elastic
Needle and thread

Make the Headband
1. Measure the circumference of your baby’s head. Deduct one inch and cut the same length from your ribbon.
2. Double fold and sew the ends of your ribbon to create a folded edge OR use fray-stop fabric liquid on each end.
3. Cut your two-inch piece of elastic in half so that you have two one-inch pieces.
4. Connect the ribbon ends together with the elastic. Sew one end of one piece of elastic to the top left corner of your ribbon. Then sew the end of the second piece of elastic to the bottom left corner of the ribbon. Repeat on the other side.

Sew the Flower
1. Fold your fabric in half length-wise, right sides facing together, and press.
2. Sew a 1/8″ seam, leaving one end of the tube open. Turn inside out. Hand stitch the other end closed OR use fray-stop.
3. On the seam side, hand sew a loose running stitch. Scrunch the fabric together after a few stitches and repeat until you have a ruffle. Sew in place.
4. Sew a button to the center. Make sure it is secure. (Please be aware that buttons are a choking hazard. Do not leave your child unattended.)
5. Sew the flower to the headband, hot-glue, or attach with a safety pin.

You Might Also Like

4 Comments

  • Reply Hope April 24, 2011 at 12:12 pm

    So cute!

    [Reply]

    Dee Reply:

    Thanks, Hope! 🙂

    [Reply]

  • Reply 18 Ways to Make Cute Baby Flower Headbands | Guide Patterns May 11, 2019 at 5:04 am

    […] 1. DIY Pretty Flower Headband for Baby Girl […]

  • Reply Craft: 18 Ways to Make Cute Baby Flower Headbands – CrochetingHearts.org August 6, 2019 at 5:02 am

    […] 1. DIY Pretty Flower Headband for Baby Girl […]

  • Leave a Reply